Starting your day with a shower shouldn’t be a struggle. If you’re finding it frustrating to get your shower head to cooperate, you’re not alone. With a few straightforward steps, you can transform this daily hassle into a hassle-free routine.
First, it’s essential to identify your shower type as this determines the specific approach you’ll need to take. Whether you’re dealing with a traditional two-knob system, a modern single-lever, or an intricate digital setup, understanding your setup is key.
Ensuring your water supply valve is turned on and inspecting for any underlying issues comes next, followed by adjusting the temperature controls to your preference. If your shower is equipped with a diverter, using it correctly is crucial for directing water to the shower head.
Key Takeaways
- Identify the type of shower you have for smooth operation.
- Check the water supply valve and inspect for blockages or leaks.
- Adjust the temperature controls gradually and test the water temperature before stepping in.
- Understand how the diverter operates and use it if your shower has one.
Identify Your Shower Type
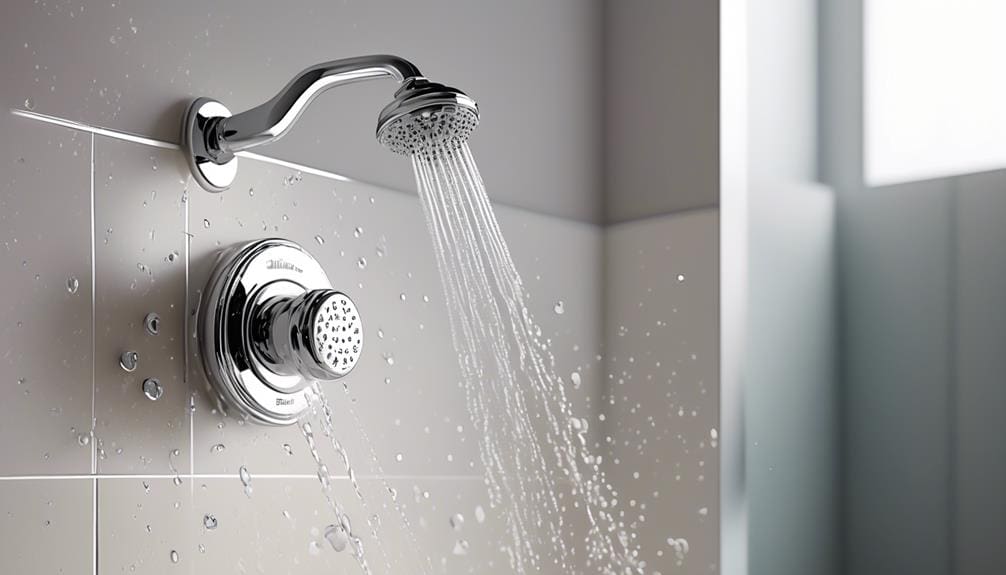
Before diving into turning on your shower, it’s essential to identify whether you’re dealing with an electric shower, a three-knob shower, or one with a diverter valve. Knowing the type of shower head and its connection to the existing shower arm is crucial for a smooth operation.
For an electric shower, you’ll first need to ensure the power switch is on. Sometimes, you might’ve to check if the breaker has tripped, which is a common reason for it not working.
If you’ve got a three-knob shower, the process involves using the third knob, usually dedicated to directing water up to the shower head. It’s a simple twist that changes the flow path.
Meanwhile, showers equipped with a diverter valve require you to pull or push the valve, a mechanism often found on the spout or as a separate lever, to switch the flow to the shower head.
Getting familiar with these specific instructions tailored to your shower model makes the process hassle-free. Whether you’re adjusting an existing setup or exploring the functionality of an Adjustable Shower, understanding your system’s basics is the first step to a refreshing shower experience.
Check Water Supply Valve
After identifying your shower type, it’s crucial to ensure the water supply valve is turned on for a steady flow to your shower head. The water supply valve, usually found in the bathroom or basement, controls the flow of water to your shower. To check if it’s on, look at its position. If the valve is perpendicular to the pipe, it’s closed. Turn it counterclockwise with an adjustable wrench to open it, ensuring water can flow to your shower head.
Next, inspect the water pipes connected to your shower head. Look for any blockages or leaks that might hinder water flow. If the water supply valve is already open but you’re facing issues, try closing it and then reopening it. This action can help reset the valve’s function and improve water flow to your shower head.
Adjust Temperature Controls
Once you’ve ensured a steady water flow to your shower head, it’s time to adjust the temperature controls to find your perfect shower temperature.
Whether you’re using a standard or handheld shower head, the process for adjusting the temperature is straightforward but crucial for a comfortable shower experience.
First, locate the temperature control knob on your shower. This is typically found on the shower’s mixer valve. To increase the temperature, turn the knob clockwise. If you prefer a cooler shower, turn it counterclockwise. It’s important to adjust the knob slowly, allowing the water temperature to change gradually. This way, you won’t be surprised by sudden hot or cold spikes.
Before stepping into the shower, always test the water temperature with your hand. This precaution ensures the water is at a comfortable temperature, reducing the risk of burns or an uncomfortably cold start to your shower. If the temperature isn’t quite right, make additional adjustments as needed. Sometimes, it takes a few tries to get the perfect temperature.
Use Diverter If Present
If your shower is equipped with a diverter valve, you’ll need to pull it to switch the water flow to the shower head. This step is crucial for showers that share a single spout for both the bathtub faucet and the shower head. The diverter essentially directs the water upwards towards the shower head instead of allowing it to flow out through the bathtub faucet.
Familiarize yourself with your shower’s specific model as the diverter valve can slightly differ in operation. For instance, if you have a three-knob setup, the third knob usually acts as the diverter. Turning or pulling this knob will redirect the water to the shower head, allowing you to enjoy a shower instead of a bath.
In some cases, the diverter valve is located above or beneath the spigot. You’ll need to pull or push this valve to activate the shower head. Always remember to use the diverter if present. It’s a simple yet essential step in ensuring that water flows from the shower head for your shower.
This knowledge will make the process smoother and prevent any initial confusion when turning on your shower.
Troubleshoot Common Issues
Having familiarized yourself with using the diverter for your shower, let’s tackle some common issues you might encounter when trying to get the water flowing.
Sometimes, despite your best efforts, the shower doesn’t work as expected. Here’s how you can troubleshoot some typical problems:
- Ensure the water valve is fully open: Occasionally, the main issue is simply that the water supply isn’t fully turned on. Check your valves to make sure they’re allowing water to flow freely.
- Check the power for electric showers: If you’ve got an electric shower, ensure the power switch is on. A tripped breaker can also prevent your shower from working, so give your electrical panel a look.
- Inspect your old shower head and shower hose: Mineral buildup or damage can obstruct water flow. Consider cleaning or replacing these parts if you see any signs of wear.
- Adjust the slide bar or diverter valve as needed: If your shower has a slide bar or a diverter valve, make sure it’s properly adjusted to direct water to the shower head.
- Understand your shower’s specific setup: Remember, turning on a shower can vary greatly depending on its type. Familiarize yourself with how yours operates, especially if it involves knobs or a unique diverter system.
Frequently Asked Questions
How Do You Turn on a Shower Head?
To turn on your shower head, you’ll need to locate the appropriate controls, which might include a power switch for electric showers or a diverter valve on or under the spigot for others.
How Do I Turn on My Shower Head Monitor?
You’re wondering how to activate your shower head monitor. First, identify your shower type. Then, locate the power switch or use the appropriate knob or diverter valve. Always follow your model’s specific instructions for the best results.
How Do You Change a Shower Head Easy?
To change your shower head easily, you’ll need to gather tools like pliers and Teflon tape. Turn off the water, remove the old head, clean the arm, apply tape, and attach the new head.
How Does a 3 Knob Shower Work?
In a 3-knob shower, you’ll find one knob controls hot water, another cold, and the third diverts water to the showerhead. Simply adjust the temperature knobs, then turn the diverter to start showering.


