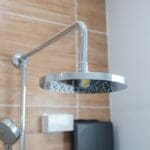
Just as you’ve started noticing the dwindling water pressure and the dated look of your shower fixtures, it’s reassuring to know you’re only three simple steps away from a solution that doesn’t require a plumber.
Key Takeaways
- Gather necessary tools and turn off water supply before starting the replacement process.
- Clean the threads and apply thread-sealing tape to prevent leaks.
- Follow manufacturer instructions for proper attachment and optimal water flow.
- Inspect the area for wear or damage before replacing the faucet and check for leaks after installation.
Preparation and Tools
Before you dive into replacing your shower head and faucet, ensure you’ve gathered all the necessary tools and prepared your workspace.
First and foremost, you must turn off the water supply to prevent any unexpected showers. This step is crucial; locate your home’s main water valve and shut it off. You’d be surprised how often this gets overlooked, leading to a wet mess and unnecessary stress.
Next, gather your tools. You’ll need an adjustable wrench, Teflon tape, and possibly a pair of pliers. The wrench will help you remove the old shower head from the shower arm and the faucet handles. Teflon tape is essential for sealing threaded joints and preventing leaks when you install the new fixtures. If you’re dealing with a Pressure Balancing valve as part of your shower setup, ensure you have the specific instructions and tools required for that model.
Clear the area and lay down towels or a blanket to protect your surfaces and catch any drips. With your workspace prepared and tools at hand, you’re set to start the replacement process smoothly and efficiently. Remember, preparation is key to a successful update of your shower’s hardware.
Installing the Shower Head
With your workspace prepared and the necessary tools in hand, you’re now ready to tackle the installation of the new shower head.
First, ensure the faucet is turned off to prevent any unexpected water flow. Unscrew the existing shower head by turning it counterclockwise. You’ll likely notice some dirt or mineral buildup; it’s crucial to clean this off the threads to ensure a smooth installation.
Next, apply thread-sealing tape around the threads. This step is vital as it prevents any potential leaks, ensuring that all water is directed through the shower head, enhancing your shower’s water flow.
Finally, attach the replacement shower head according to the manufacturer’s instructions, making sure it’s secure but not overtightened.
Here’s why these steps are important:
- Turning off the faucet prevents unnecessary water waste and potential mess.
- Cleaning the threads ensures a seamless fit for the new shower head.
- Applying thread-sealing tape is crucial for a leak-free installation.
- Proper attachment of the shower head guarantees optimal water flow.
- Following manufacturer instructions ensures the correct handling of both cold and hot water through the shower cartridge and shower heads, preserving the integrity of your plumbing system.
Replacing the Faucet
Now that you’ve successfully installed the shower head, it’s time to focus on replacing the faucet to complete your bathroom upgrade. This task, while seemingly hard, can be straightforward if you follow these precise steps.
First off, ensure the water supply is turned off. This is a crucial step to prevent any accidental water spillage.
Next, remove the old faucet. You might need a wrench for this. Carefully unscrew and lift the faucet from its position, making sure not to damage any surrounding tiles or the shower drain.
Before installing the new faucet, inspect the area for any signs of wear or damage. This could be an opportune moment to address any issues that might affect the performance of your new installation. Remember, the goal isn’t just aesthetic improvement but also functional enhancement.
Installing the new faucet is essentially the reverse process of removing the old one. Position the new faucet, ensuring it’s aligned correctly, and then securely tighten it with the wrench. Make sure all connections are tight to avoid leaks.
Lastly, turn the water supply back on and check for any leaks. This step is crucial to ensure that your installation is successful and that there are no issues with your home’s commercial plumbing.
With these steps, you’ve now upgraded both your shower head and faucet, enhancing your bathroom’s functionality and style.
Frequently Asked Questions
How Do You Change a Shower Head Easy?
To change your shower head easily, turn off the water, unscrew the old one, clean the threads, apply sealing tape, and screw on the new head. Check for leaks and adjust as needed.
How Difficult Is It to Replace a Shower Faucet?
Replacing your shower faucet’s difficulty varies. Simple swaps you can likely handle, but complex models might need a pro. Assess your skills before diving in. It’s a project that can greatly improve your shower’s performance.
Is It Easy to Replace Shower Head and Hose?
Yes, replacing your shower head and hose is quite easy. You’ll need basic tools and a new shower head with hose. Simply unscrew the old one, clean the threads, and screw on the new setup.
Can I Replace a Shower Valve Myself?
You can replace a shower valve yourself if you’re confident in your plumbing skills. However, consider professional help for complex valves or electrical work to ensure it’s done right and avoid potential damage.


