Have you ever felt the trickle of your shower more reminiscent of a gentle rain than the powerful cascade you crave? If so, you’re not alone. Many find themselves wrestling with their Kohler shower head, unaware that the culprit behind this water woe is a small, yet significant, flow restrictor.
By taking matters into your own hands, you can transform your shower experience. The process is straightforward: gather your tools, locate the flow restrictor, and remove it carefully. However, it’s crucial to proceed with caution to avoid damage and ensure a successful outcome.
Follow these steps, and you’ll unlock the full potential of your shower, but remember, there’s more to consider before you embark on this DIY journey.
Key Takeaways
- Tools needed: adjustable wrench or pliers, Teflon tape or plumber’s tape, clean cloth or rag
- Locate the flow restrictor by removing the showerhead and funnel-shaped screen
- Remove and clean the flow restrictor, ensuring proper reassembly for optimal water flow
- Caution: removing the flow restrictor can significantly increase water pressure
Gather Your Tools
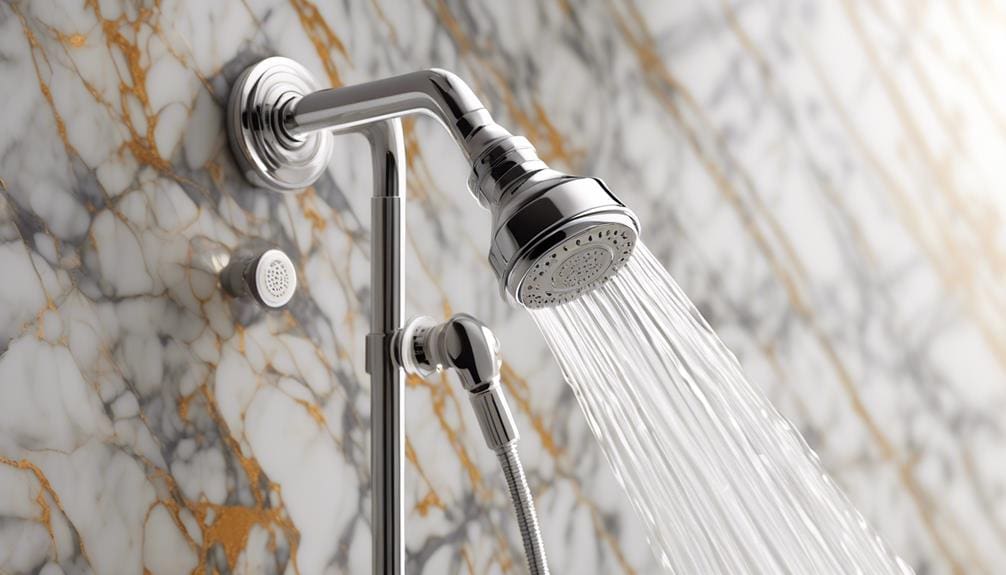
Before you embark on removing the flow restrictor from your Kohler shower head, make sure you’ve got all the necessary tools on hand. To tackle this task effectively, you’ll need an adjustable wrench or pliers. These are crucial for gripping and unscrewing the shower head from the shower arm. Often, water pressure issues in your Kohler shower can be resolved by removing the flow restrictor, but first, you must remove the showerhead.
Additionally, gather Teflon tape or plumber’s tape. This will be useful for resealing the shower head to the shower arm once you’ve removed the flow restrictor. A clean cloth or rag is also essential. It’ll protect the surface of your Kohler shower head from scratches while you’re using the wrench or pliers. If your shower head design requires it, have a screwdriver ready for disassembling parts to access the flow restrictor.
Lastly, keep a bucket or container nearby. You’ll use this to catch any residual water when you remove the showerhead. With these tools at your disposal, you’re well-prepared to remove the flow restrictor and improve your shower’s water pressure.
Locate the Flow Restrictor
After gathering your tools, the next step is to unscrew the showerhead to locate the flow restrictor. This component is crucial for controlling water flow in your Kohler shower, but removing it can significantly increase water pressure.
Once you’ve unscrewed the showerhead, you’ll need to carefully remove the funnel-shaped screen that’s inside. This screen often captures debris and is the first layer you encounter.
Directly behind this screen, you’ll find the flow restrictor. It’s typically a green plastic plug accompanied by a black rubber o-ring. This small piece is what you’re aiming to remove to enhance your shower’s water flow. To effectively remove the water restrictor, use a dental pick or a small knife. Be gentle as you pry out the rubber o-ring without damaging the surrounding components.
Remove and Reassemble
Once you’ve successfully removed the flow restrictor, it’s crucial to clean and reassemble the showerhead components meticulously. Removing the flow restrictor from your Kohler shower can significantly increase the gallons per minute, transforming your shower experience. However, reassembly must be handled with care to ensure everything functions correctly.
Firstly, ensure the green plastic plug, accompanied by the black rubber o-ring, is properly placed back into the showerhead. This step is vital for preventing leaks and maintaining the correct water flow. If the o-ring seems worn out or damaged, consider replacing it to avoid future issues.
Using a dental pick or a small knife, carefully remove any debris from the rubber o-ring and the green plastic plug. This ensures a snug fit and prevents water leakage.
Next, clean the screen by rinsing it under running water to remove any sediment or buildup. Reattach the screen to your Kohler shower head, making sure it’s securely in place.
Follow these steps by screwing the showerhead back onto the shower arm. Tighten it by hand to avoid damaging the threads. Finally, turn on your shower to test the water flow. You should notice an immediate increase in the gallons per minute, enhancing your showering experience with your handheld or fixed Kohler shower heads.
Frequently Asked Questions
How Do You Remove a Kohler Shower Flow Restrictor?
To remove a Kohler shower flow restrictor, you’ll need to first turn off the water. Then, unscrew the shower head, locate the restrictor, and use pliers to twist it out. Reassemble and test the flow.
How Do You Remove a Low Flow Restrictor From a Shower Head?
To remove a low flow restrictor from your shower head, first turn off the water. Unscrew the head, locate the restrictor, and twist it out with pliers. Clean it, reassemble, and check the flow.
Is It OK to Remove Flow Restrictor From Shower Head?
Yes, you can remove the flow restrictor from your shower head to boost water flow, especially in low-pressure areas. However, consider water conservation and potential increase in water bills before doing so.
How Do You Change a Low Flow Shower Head to High Flow?
To boost your shower’s flow from low to high, start by consulting those experienced in this task. Then, carefully remove the flow restrictor and clean the screen. This should noticeably improve your water pressure.