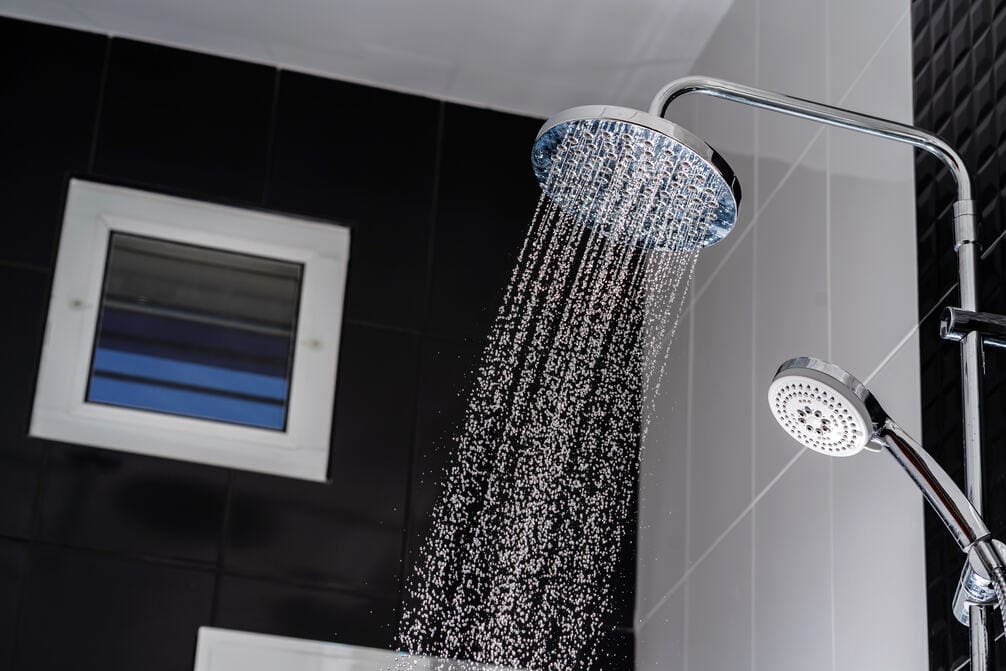
Embarking on the journey to upgrade your shower is no small feat, but with the right tools and a bit of know-how, you’ll be singing in the rain—or at least under your new rain shower head with handheld functionality—in no time.
The subsequent steps will guide you through installing the base, attaching the rain shower head, connecting the handheld unit, and ensuring everything is leak-free.
However, the devil is in the details, and understanding the nuances of each step can make the difference between a refreshing cascade and a disappointing dribble.
Key Takeaways
- Gather all necessary tools and materials before beginning the installation process.
- Properly remove the old showerhead and clean the threads on the shower arm.
- Install the diverter valve securely and use thread seal on all connections.
- Attach the rain shower head and handheld shower, ensuring proper alignment and tight connections.
Gather Your Tools and Materials
Before beginning the installation of your rain shower head with handheld, ensure you’ve gathered all necessary tools and materials, including:
- Shower diverter
- Thread seal
- Shower hose
- Handset
- Shower bracket
We recommend the Flexispray Chrome Plated Economy Flow Switch as your diverter, you’ll be able to seamlessly switch water flow between the rain shower head and the handheld shower head.
Also pick up some Kinetic 12mm x 10m White Standard Thread Seal which is crucial for preventing leaks by wrapping it around the threads of the shower arm and the diverter.
Next, the Estilo 1500mm Stainless Steel Double Lock Shower Hose connects the diverter to the Flexispray WELS 3 Star 9L/Min Chrome Single Function Bermuda Handset, ensuring a durable and flexible water supply.
For mounting the handheld shower head, the Flexispray Chrome Bermuda Shower Bracket will be affixed to the wall. It’s important to use plumbers tape around the threads of both the shower arm and the wall bracket to ensure a tight, leak-proof connection.
Lastly, before you attach the handheld shower head or diverter, make sure the water supply is turned off. This precaution prevents any accidental water spillage during the installation.
Remove Existing Shower Head
Having gathered all necessary tools and materials, your next step is to remove the old showerhead by using an adjustable wrench or pliers, ensuring you wrap it with a cloth or leather to prevent damage. This is a crucial step in preparing to install a shower system with a handheld component.
To ensure a smooth transition to your new showerhead and handheld, follow these steps:
- Protect the showerhead: Before attempting to remove the old shower fixture, wrap it carefully to avoid scratching or damaging its surface.
- Loosen and remove: Use the wrench or pliers to gently but firmly twist the showerhead counterclockwise to detach it from the shower arm.
- Clean the threads: Once removed, clean any mineral deposits or old pipe compound from the pipe threads on the shower arm to ensure a secure and leak-free installation of the new one.
- Apply plumber’s tape: Wrap new plumber’s tape clockwise around the cleaned threads to facilitate a better seal, enhancing water pressure and preventing leaks.
- Prepare for the new installation: With the old showerhead removed and the pipe prepared, you’re now set to install the new shower head and handheld, potentially incorporating a diverter valve if your shower system requires it.
Install the Diverter Valve
Once you’ve removed the old showerhead and prepared the pipe, it’s time to install the diverter valve, a crucial component for alternating water flow between the rain shower head and handheld shower. Select a shower diverter, like the Flexispray Chrome Plated Economy Flow Switch, tailored for shower systems that integrate both a rain shower head and a hand held shower head.
First, connect the diverter to the wall, ensuring it’s securely in place, then reattach the shower arm to its outlet. This setup is essential for a seamless transition between a shower with handheld functionality and the immersive experience of a rain shower head. To prevent leaks, use Kinetic 12mm x 10m White Standard Thread Seal on all threaded connections, ensuring a watertight seal.
While there are alternative placement options for the flow switch, attaching it to the wall is most recommended for ease of use and stability. For an optimal showering experience, employ recommended components like the Estilo 1500mm Stainless Steel Double Lock Shower Hose, Flexispray WELS 3 Star 9L/Min Chrome Single Function Bermuda Handset, and Flexispray Chrome Bermuda Shower Bracket. This setup allows you to efficiently add a handheld shower to your existing shower system.
Attach the Rain Shower Head
After installing the diverter valve, it’s time to attach the rain shower head to the shower arm using the right fittings. This step is crucial to ensure your shower head system functions properly, delivering an optimal shower experience.
Here’s how to securely attach the rain shower head:
- Use thread seal tape on all threaded connections to ensure a tight seal between the shower arm and the rain shower head.
- Ensure the rain shower head is facing downwards and aligned properly with the mixing valve for optimal water flow.
- Tighten all connections by hand initially to avoid cross-threading, which could damage your fittings.
- Use a wrench to snug up the connections. Be careful not to overtighten, as this could damage the threads or the rain shower head itself.
- Turn on the water and test the installation for any leaks. If you find any, make necessary adjustments to the connections.
Connect the Handheld Shower
To connect the handheld shower, start by securing the showerhead base to the shower arm and then attach the flexible shower hose to this base. This step is crucial in ensuring that both the shower and handheld can function without leaks.
If your setup includes a diverter, this is the key component that will allow you to switch between the showerhead and the handheld shower. Typically, the diverter is installed in the wall, allowing for seamless integration with your plumbing system.
For those using a cross-tee diverter fitting, reconnect the original showerhead to one outlet of the diverter. Then, attach the flexible hose of the handheld showerhead onto the other outlet. This setup enables you to easily switch the water flow between the two shower options.
Alternatively, if you’re using a tub spout diverter valve, replace the old tub spout with a new one that includes a diverter fitting and connect the handheld shower’s flexible hose directly to the spout’s diverter valve.
Frequently Asked Questions
How Do You Install a Handheld Shower Head?
To install a handheld shower head, you’ll attach the base to the shower arm, connect the hose, attach the showerhead, check for leaks, and mount the wall bracket if needed. It’s straightforward!
Can You Add a Handheld Shower to an Existing Rain Shower Head?
Yes, you can add a handheld shower to an existing rain shower head. You’ll need a diverter to connect both heads to your shower’s water source, ensuring you have the right tools and adapters.
Can You Use Rain Shower and Handheld at the Same Time?
Yes, you can simultaneously use a rain shower and handheld by installing a shower diverter. Connect both to the diverter’s outlets, ensuring to check for leaks and tighten any loose connections as needed.
Do You Need a Diverter for a Handheld Shower Head?
Yes, you need a diverter for a handheld shower head to switch water flow between it and the rain shower head. The Flexispray Chrome Plated Economy Flow Switch is a recommended choice for this.


