Navigating the waters of home maintenance can often feel like embarking on a treacherous voyage, but when it comes to disassembling your Moen adjustable shower head, fear not. You’re just three steps away from mastering this task.
Key Takeaways
- Gather necessary tools: adjustable wrench, plumber’s tape, bucket or basin, vinegar or mild cleaner.
- Remove shower head carefully: use wrench or pliers, ensure water flow is closed.
- Clean each part separately: use gentle cleaner or vinegar solution, scrub with soft-bristle brush.
- Inspect and clean parts: look for wear or damage, pay attention to flow restrictor.
Remove the Shower Head
Gather a few essential tools: an adjustable wrench, plumber’s tape (also known as Teflon tape), a bucket or basin, white vinegar or a mild cleaner, and a soft-bristle brush. This preparation step is crucial for a successful DIY project, ensuring you have everything at hand to tackle the task efficiently.
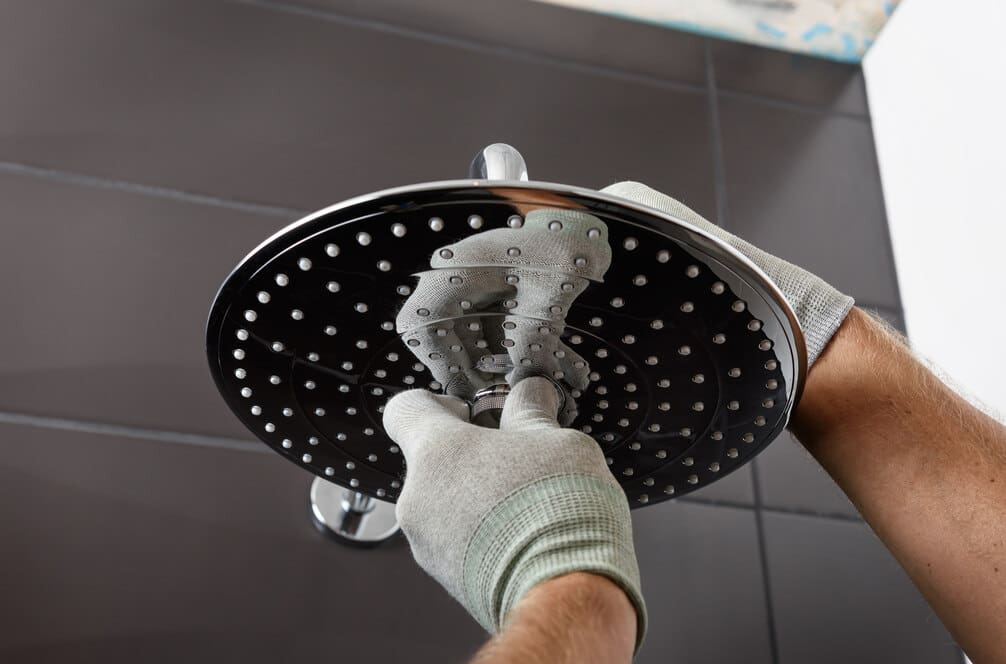
To take apart a Moen shower head, you’ll need to remove it carefully to avoid damaging your plumbing. Start by placing the bucket or basin under the head to catch any residual water. Using the adjustable wrench, gently loosen the shower head from the pipe. If it’s tight, wrap a cloth around the head before using the wrench to prevent scratches. A pair of pliers might also come in handy for stubborn fittings.
Once you’ve managed to remove the shower head, you’ll disassemble the showerhead components for a thorough clean. Use the soft-bristle brush dipped in white vinegar or a mild cleaner to remove any build-up.
Reassembling is just the reverse, but remember to wrap the threads with Teflon tape to ensure a leak-free reinstallation.
Clean and Inspect Parts
Once you’ve disassembled your Moen shower head, start by cleaning each part separately with a gentle cleaner or a vinegar solution to ensure they’re free from any buildup or debris. Use a soft-bristle brush to meticulously scrub each component, paying special attention to the small holes that can easily become clogged with mineral deposits. These deposits can significantly reduce water pressure, making your shower less enjoyable.
After everything has been taken apart and cleaned, it’s crucial to rinse the shower head thoroughly to remove any leftover cleaner or loosened debris. Make sure to inspect each piece for signs of wear or damage, such as cracks or corrosion. This includes giving the flow restrictor a close look, as it’s vital for maintaining proper water pressure in the shower.
Frequently Asked Questions
How Do You Remove an Adjustable Shower Head?
To remove an adjustable shower head, you’ll unscrew it counterclockwise using an adjustable wrench. If there’s a cover, find and remove the small screw, then gently slide the cover off to access inner parts.
How Do You Take Apart a Shower Head to Clean It?
To clean your shower head, first unscrew it from the shower arm. Then, soak it overnight in a vinegar-water solution. Lastly, scrub away any debris. Reassemble by reversing the disassembly steps.
How Do I Clean My Moen Magnetix Shower Head?
To clean your Moen Magnetix shower head, remove it, soak in white vinegar and warm water overnight, scrub the nozzles with a soft brush, rinse well, and reattach it to the shower arm.
How Do You Unscrew a Tight Shower Head Hose?
To unscrew a tight shower head hose, you’ll need to grip it with pliers covered in a cloth. If it’s really stubborn, apply WD-40 or heat it with a hairdryer before attempting again.


